hi mountain snack sticks instructions

Hi Mountain Snack Sticks Instructions: A Comprehensive Guide
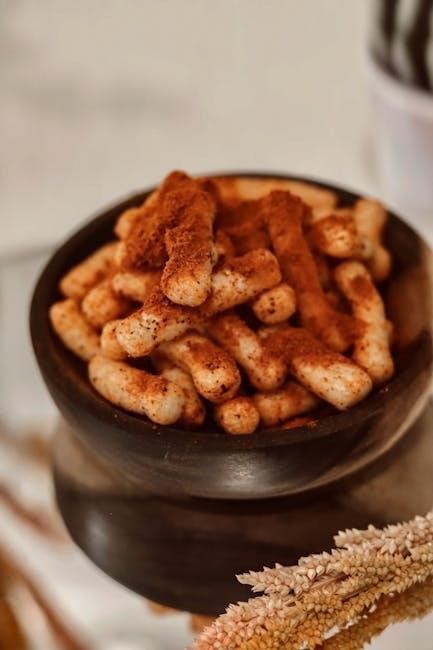
Discover the art of crafting delicious snack sticks with Hi Mountain’s seasoning kits, designed for beef, pork, venison, and wild game. Perfect for beginners and experienced makers alike, these kits provide everything needed to create flavorful, professionally cured snacks at home. Follow the step-by-step guide to ensure perfect results every time, whether you’re smoking, drying, or seasoning. Customize your snack sticks with additional spices or keep it simple for a classic taste. This guide covers it all!
Hi Mountain Snack Sticks are a popular choice for homemade snack stick enthusiasts, offering a convenient and flavorful way to create delicious, professionally cured snacks. These kits are designed for both novices and experienced makers, providing everything needed to craft tasty snack sticks at home. With pre-mixed seasoning blends, cure, and casings included, Hi Mountain Snack Stick Kits make the process easy and enjoyable. Perfect for beef, pork, venison, and wild game, these kits allow you to customize your snack sticks with additional spices or keep them simple for a classic taste. The instructions are clear and straightforward, ensuring success for all skill levels. Whether you’re smoking, drying, or seasoning, Hi Mountain Snack Stick Kits are a great way to enjoy homemade snacks with minimal effort and maximum flavor.
Ingredients and Materials Needed
Hi Mountain Snack Stick Kits include seasoning, cure, and casings, supporting up to 20 lbs of meat. Use beef, pork, venison, or wild game for versatile creations. Ensure you have a grinder, stuffing tubes, and smoker for preparation. Additional spices can be added for customization. Proper materials and ingredients are essential for achieving the perfect texture and flavor in your homemade snack sticks. Follow the kit’s directions for precise measurements and best results. This setup makes homemade snack sticks easy and enjoyable to make. With these ingredients and tools, you can create delicious, professionally cured snacks at home.
Seasoning Kits and Their Components

Hi Mountain offers a variety of seasoning kits tailored for snack sticks, such as the Cracked Pepper Garlic Blend and Hunters Blend. Each kit typically includes a seasoning mix, cure, casings, and detailed instructions. The seasoning provides flavor, while the cure ensures food safety and prevents spoilage. Casings, often 19mm or 21mm collagen, give the snack sticks their signature snap and texture. These kits are designed to season up to 20 pounds of meat, making them ideal for both small batches and larger productions. Customization is easy, allowing users to add personal touches like cayenne pepper or crushed peppercorns. With all components included, Hi Mountain kits simplify the process, ensuring consistent and delicious results for beginners and experienced makers alike. This convenience makes them a popular choice for crafting homemade snack sticks. The kits are available on platforms like Amazon and Hi Country Trading Post. Follow the instructions for precise measurements to achieve the best flavor and texture. Whether you prefer classic or bold flavors, Hi Mountain’s seasoning kits offer a reliable and tasty experience.
Meat Options: Beef, Pork, Venison, and Wild Game

Hi Mountain Snack Stick kits are versatile and can be used with a variety of meats, including beef, pork, venison, and wild game. Beef offers a hearty, robust flavor, while pork adds juiciness and tenderness. Venison, a leaner option, provides a distinct earthy taste, making it a favorite for wild game enthusiasts. Wild game meats, such as deer or elk, can also be used, offering a unique and savory flavor profile. Many users blend meats, such as combining venison with pork, to achieve the perfect balance of flavor and texture. The kits are designed to accommodate up to 20 pounds of meat, allowing for customization and experimentation. Whether you prefer traditional beef or adventurous wild game, Hi Mountain’s seasoning kits ensure delicious results. This flexibility makes them ideal for hunters and home processors alike, providing a tasty way to enjoy your harvest year-round.
Tools Required: Grinders, Stuffing Tubes, and Smokers
To successfully make Hi Mountain Snack Sticks, you’ll need essential tools like a meat grinder, stuffing tubes, and a smoker. A grinder ensures your meat is finely ground and mixed evenly with seasonings. Stuffing tubes are crucial for filling casings neatly and consistently. Smokers add smoky flavor and help cure the sticks. Optional tools include a mixer for combining ingredients and gloves for handling casings. Proper equipment ensures quality and safety, making the process efficient and enjoyable; These tools are key to achieving professional-tasting snack sticks at home.
Step-by-Step Preparation Process

Grind the meat finely, mix with Hi Mountain seasonings, stuff into casings, and cure. Smoke or dry to perfection for a delicious homemade snack stick.
Grinding and Mixing the Meat
Start by grinding your choice of meat, such as beef, pork, or venison, using a meat grinder to achieve a fine texture. Combine the ground meat with Hi Mountain seasoning kits, which include cure, casings, and directions. Mix thoroughly to ensure even distribution of flavors. For enhanced taste, add optional spices like cayenne or crushed peppercorn. Allow the mixture to rest in the refrigerator for 24 hours to marinate, ensuring the flavors meld together perfectly. This step is crucial for developing the desired consistency and taste in your snack sticks. Proper mixing prevents uneven seasoning and ensures a professional finish. Follow the kit instructions for precise measurements to avoid overpowering the natural meat flavor. Once mixed, the meat is ready for stuffing into casings, the next step in creating delicious homemade snack sticks.
Stuffing the Meat into Casings
Attach the provided casings to the stuffing tube, ensuring a snug fit to prevent air pockets. Gently feed the meat mixture into the grinder, maintaining steady pressure to fill the casings evenly. Guide the stuffed casings onto a clean surface, forming straight sticks. Avoid overstuffing, as this can cause casings to burst during drying. If air pockets form, gently press the meat to eliminate them. Once stuffed, hang the sticks on hooks or racks, leaving space between each for even drying. Allow the sticks to rest in the refrigerator for a few hours before curing or smoking. This step ensures the meat adheres properly to the casings and prepares the snack sticks for the next phase of processing. Proper stuffing is essential for achieving uniform texture and flavor in the final product.

Curing and Drying Process
Apply the cure evenly, ensuring meat is coated. Allow to cure in a controlled environment, maintaining temperatures between 160-200°F. Monitor humidity to prevent over-drying. Cure for several hours or overnight to lock in flavor and texture. Proper curing and drying are critical for food safety and achieving the perfect snack stick consistency. Always follow the curing instructions provided with your Hi Mountain kit to ensure a successful outcome.
Understanding the Curing Process
Curing is a crucial step in making Hi Mountain snack sticks; It involves using a cure mix to prevent bacterial growth and enhance flavor. The cure typically contains salt, sugar, and nitrates, which help preserve the meat and maintain its color. When applying the cure, ensure it’s evenly distributed across the ground meat. The curing process usually takes several hours or overnight, depending on the kit instructions. It’s essential to keep the meat refrigerated during this time to allow the cure to penetrate evenly. Proper curing ensures the snack sticks are safe to eat and have a savory, well-balanced flavor. Always follow the cure instructions provided with your Hi Mountain kit to achieve the best results. Monitoring the curing process closely will help you create delicious and professionally made snack sticks at home.
Drying and Monitoring Techniques

Drying is a critical step in making Hi Mountain snack sticks. After stuffing the meat into casings, hang them in a well-ventilated area or use a smoker to control temperature and humidity. Maintain a consistent temperature of 150-200°F to ensure even drying. Monitor the sticks closely to prevent over-drying, which can make them brittle. Use a meat thermometer to check internal temperatures, aiming for 160°F for safety. If using a smoker, keep the humidity low to avoid moisture buildup. Regularly inspect the sticks for uniform dryness and texture. Proper drying ensures the snack sticks are chewy yet firm, with a long shelf life. Always follow the drying instructions provided with your Hi Mountain kit for optimal results. This step requires patience, as it can take several hours depending on the environment and setup.

Cooking and Smoking Instructions
Cooking and smoking are essential steps to achieve the perfect flavor and texture for your Hi Mountain snack sticks. Preheat your smoker to 150-200°F, depending on your desired level of smokiness. Use your preferred type of wood chips, such as hickory or mesquite, for added flavor. Once the smoker is ready, place the snack sticks on the racks, ensuring they are not overcrowded for even cooking. Smoke the sticks for 3-4 hours, or until they reach an internal temperature of 160°F. Monitor the temperature closely to avoid overcooking. After smoking, allow the sticks to cool slightly before storing them. For an extra touch, you can finish them in a hot pan for a crispy exterior. Always follow the smoking guidelines provided with your Hi Mountain kit for consistent results. Proper cooking ensures your snack sticks are flavorful and safe to eat.