imperial kool-ray installation instructions

The Imperial Kool-Ray Aluminium Railing System offers a durable and aesthetically pleasing solution for outdoor spaces, requiring precise installation techniques to ensure stability and longevity.
Overview of the Imperial Kool-Ray Aluminium Railing System

The Imperial Kool-Ray Aluminium Railing System is a high-quality, durable solution designed for outdoor and indoor applications. Made from high-strength aluminium, it offers a sleek, modern aesthetic while ensuring long-lasting performance. The system is engineered with precision, featuring pre-drilled holes and interchangeable components for easy customization. Available in various finishes, including powder-coated options, it provides resistance to corrosion and weathering. Suitable for residential and commercial use, the railing system is lightweight yet robust, making it ideal for balconies, staircases, and porches. Its modular design allows for seamless integration into diverse architectural styles, ensuring both functionality and visual appeal.
Importance of Proper Installation Techniques
Proper installation of the Imperial Kool-Ray Aluminium Railing System is crucial for ensuring safety, durability, and structural integrity. Incorrect techniques can lead to loose connections, instability, and potential safety hazards. Following manufacturer guidelines ensures the railing withstands environmental stresses and heavy use. Precise measurements, secure fastening, and alignment are essential to maintain the system’s aesthetic appeal and functionality; Improper installation can void warranties and compromise the system’s longevity. Adhering to installation best practices guarantees a sturdy, reliable, and visually appealing railing system that meets safety standards and enhances the overall property value. Proper techniques are vital for long-term performance and user satisfaction.
Essential Tools and Materials Needed
Drill, screwdrivers, measuring tape, level, and wrench are essential tools. Materials include screws, post caps, railing sections, and brackets for a secure and stable installation.
Required Tools for the Installation Process
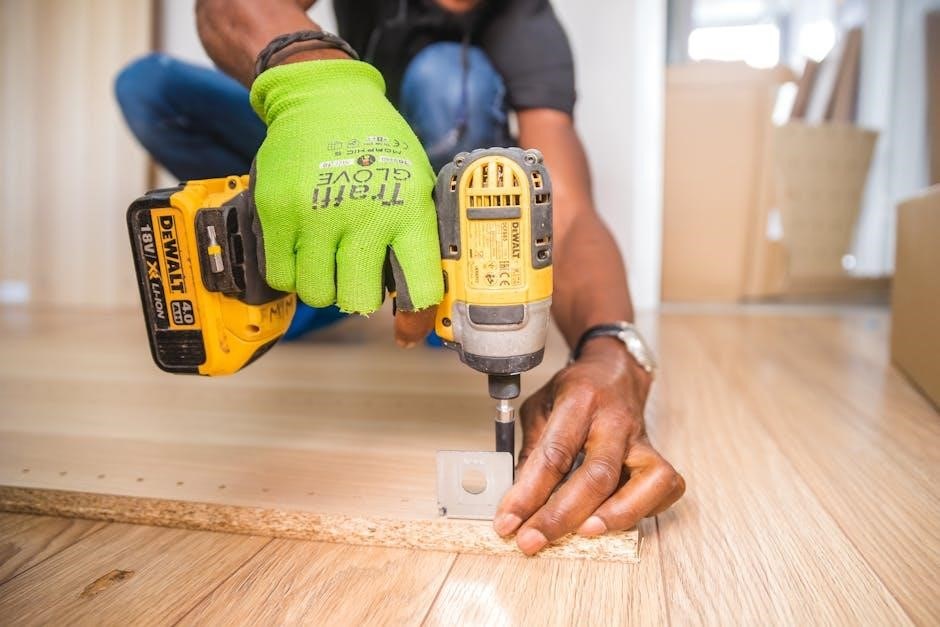
A drill, screwdrivers, measuring tape, and level are essential for precise installation. A wrench is needed for tightening connections, while a saw or cutter is required for resizing railings; Safety gear, including gloves and goggles, is crucial for protecting yourself during the process. Additional tools like a pencil for marking and a ladder for elevated areas may also be necessary. Ensure all tools are in good condition to avoid delays and ensure a secure, professional-grade installation of the Imperial Kool-Ray Aluminium Railing System.
Materials Necessary for a Successful Installation
The Imperial Kool-Ray Aluminium Railing System requires specific materials for installation, including the railing kit itself, which contains pre-cut aluminium rails and posts. Additional materials needed are mounting brackets, screws, and anchor bolts for securing the system to pillars or walls. Weather-resistant adhesives and sealants are recommended to ensure durability against outdoor conditions. Post caps and decorative accents can be added for a finished look. Ensure all materials are compatible with the system and suitable for the environmental conditions where the railing will be installed.
Safety Precautions and Guidelines
Always wear protective gear, ensure a stable work environment, and follow manufacturer instructions to avoid accidents. Check weather and surface conditions before starting installation work.
General Safety Measures to Follow

Ensure the installation site is clear of debris and obstacles. Always assess the area for potential hazards, such as uneven surfaces or loose materials. Use proper lifting techniques to avoid injury. Keep power tools away from water and ensure they are in good working condition. Wear appropriate footwear with traction to prevent slips. Secure loose clothing or long hair to avoid entanglement with tools. Ensure proper ventilation when cutting or drilling materials. Never work at heights without a stable ladder or scaffolding. Always follow the manufacturer’s safety guidelines for tools and materials. Regularly inspect equipment for damage or wear. Stay alert and avoid distractions during the installation process.
Protective Gear and Equipment Recommendations
Wear safety glasses or goggles to protect eyes from debris during cutting or drilling. Use gloves to prevent cuts and abrasions while handling sharp materials. A dust mask is essential when sawing or sanding to avoid inhaling particles. Steel-toe boots provide protection from heavy objects and tools. Ensure loose clothing is secured to prevent entanglement with equipment. A hard hat is recommended when working at heights or near overhead obstructions. Hearing protection, such as earplugs, is necessary when using loud power tools. Always ensure protective gear fits properly and is in good condition for optimal safety. Regularly inspect equipment for damage or wear.
Site Preparation and Planning
Site preparation and planning are crucial steps to ensure a smooth Imperial Kool-Ray installation. Assess the area, verify measurements, and prepare the ground properly. This foundational step guarantees accurate fits and a stable setup.
Assessing the Installation Site

Assessing the installation site is the first critical step in ensuring a successful Imperial Kool-Ray setup. Begin by evaluating the area where the railing will be installed. Check for level surfaces and ensure the ground is stable and even. Identify any obstructions, such as uneven terrain or existing structures, that may interfere with the installation. Measure the length of the railing required and verify the spacing between posts. Ensure the site is clear of debris and vegetation. If the surface is uneven, determine whether adjustments or additional supports are needed. This step ensures a proper fit and prevents potential installation issues.
Measuring and Marking the Area
Accurate measuring and marking are essential for a precise Imperial Kool-Ray installation. Begin by measuring the total length of the railing required, ensuring it fits the assessed site dimensions. Use a tape measure to determine the spacing between posts, typically 3-4 feet apart for stability. Mark the center points for each post using a pencil or marker. Double-check measurements to avoid errors. If the surface is concrete, use a marker to outline the post locations. For wood surfaces, lightly mark the areas with a pencil. Proper marking ensures alignment and even distribution of the railing components, guaranteeing a professional finish.

Step-by-Step Installation Guide
A comprehensive guide outlining the process from cutting aluminium railings to assembling components and securely attaching them to pillars for a sturdy finish.
Cutting the Aluminium Railing to Size
Begin by measuring the required length for each railing section using a tape measure. Mark the aluminium with a pencil or marker. Use a hacksaw or angle grinder for precise cuts, ensuring smooth edges. Wear safety goggles and gloves to protect against debris. Cut slowly and steadily to maintain accuracy. After cutting, use a metal file to smooth any rough edges. Double-check measurements to ensure proper fit before proceeding with assembly. Accurate cutting is crucial for a secure and visually appealing installation.
Assembling the Railing Components
Start by unpacking and organizing all components, ensuring no parts are missing. Refer to the installation manual for specific assembly instructions. Begin with the base brackets, securing them to the pre-measured positions. Align the railing posts with the brackets and gently tap them into place using a rubber mallet. Connect the horizontal rails to the posts using the provided bolts or screws. Ensure all fittings are tightly secured but avoid overtightening. Use a spirit level to verify proper alignment. Once assembled, double-check all connections for stability and adjust as needed. Proper assembly ensures a sturdy and visually appealing railing system.
Attaching the Railing to the Pillars
Position the railing system against the pillars, ensuring proper alignment with pre-drilled holes. Use the provided mounting brackets to secure the railing to the pillars. Drill pilot holes if necessary, then insert anchor bolts or screws. Tighten all fasteners firmly but avoid overtightening, which may damage the material. Double-check the alignment and stability of the railing. If adjustments are needed, loosen the bolts slightly and reposition before tightening again. Verify that all connections are secure and the railing is evenly spaced. Finally, ensure the railing is level and properly attached to the pillars for optimal safety and visual appeal.
Installing Post Caps and Finishing Touches
Once the railing is securely attached, focus on installing post caps for a polished look. Clean the top of each pillar to ensure proper adhesion. Apply the provided adhesive to the base of the post cap and firmly press it onto the pillar. Align the cap evenly, ensuring it sits flush with the top surface. If necessary, use a rubber mallet to tap it into place. Allow the adhesive to set as per the manufacturer’s instructions. Finally, inspect all post caps to ensure they are securely fitted and evenly spaced, completing the installation process with a professional finish.
Final Checks and Testing
Inspect all connections, ensuring they are tight and secure. Verify the railing’s stability by gently shaking it. Check alignment and proper post cap installation for a safe finish.
Tightening All Connections
Tightening all connections is critical for ensuring the structural integrity of the Imperial Kool-Ray Aluminium Railing System. Use a wrench or Allen key to secure bolts and screws firmly, following the manufacturer’s torque specifications. Start by checking the post-to-railing connections, ensuring they are snug and even. Next, tighten the brackets and any hardware connecting the railing to the pillars. Avoid overtightening, as this could damage the aluminium or strip the threads. Double-check every connection to confirm they are secure. Finally, revisit all tightened areas after 24 hours to ensure no loosening has occurred due to settling. This ensures long-term stability and safety.
Ensuring Stability and Safety
After installation, ensure the Imperial Kool-Ray Aluminium Railing System is stable and safe by testing its strength. Apply moderate pressure to the railing to check for any wobbling or movement. Verify that all posts are evenly spaced and properly aligned. Inspect the entire structure for any loose or damaged components. Ensure the railing meets local safety standards, such as height requirements and load-bearing capacity. Conduct a final walk-through to identify and address any potential hazards. Regular inspections and maintenance will help maintain stability and safety over time, ensuring the system remains reliable and secure for years to come.
Maintenance and Care
Regularly clean the Imperial Kool-Ray Aluminium Railing with mild detergent and water to maintain its appearance. Inspect for damage or wear and address promptly to ensure longevity.
Regular Maintenance Tips
Regular maintenance is essential to preserve the durability and appearance of Imperial Kool-Ray Aluminium Railings. Clean the railing periodically with a mild detergent and water to remove dirt and grime. Avoid using harsh chemicals or abrasive materials that could damage the surface. Inspect the railing for any signs of wear, such as loose connections or rust, and address these issues promptly. Lubricate moving parts, like hinges, to ensure smooth operation. Additionally, protect the railing from environmental stressors, such as extreme weather conditions, by applying a protective coating if necessary. Regular upkeep ensures longevity and maintains the railing’s aesthetic appeal.
Cleaning and Upkeep Instructions
Regular cleaning is vital to maintain the Imperial Kool-Ray Aluminium Railing’s appearance and durability. Use a soft cloth and mild soap solution to wipe down the surface, avoiding harsh chemicals or abrasive materials. Rinse thoroughly with clean water to remove any residue. For tougher stains, a gentle scrubber may be used, but avoid scratching the finish. Dry the railing with a clean towel to prevent water spots. Inspect for any damage or corrosion during cleaning and address issues promptly. Repeat this process every 2-3 months or as needed, depending on environmental conditions. Seasonal deep cleans can further protect the railing from dirt buildup.